Introduction
Working as a SQL Server DBA, I have often encountered problems that render a database inaccessible or corrupt. Some of these problems are listed as follows.
- Database, backups, and secondary servers getting infected with malware.
- Database files getting damaged and data corruption due to hardware failures.
- Accidental deletion of database records or dropping a database
While backups can help restore the database, there might not be enough backups to retrieve all the data. In such a situation, a SQL recovery tool such as Stellar Repair for MS SQL can help you regain access to your database without modifying the data.
Installation Requirements
You must have SQL Server installed on your system to run the SQL repair tool. In addition, your system must meet their installation requirements:
Version: MS SQL server 2019, 2017, 2016, 2014, 2012, 2008 R2, 2008, and earlier versions
OS: Windows 11, 10, 8.1, 8, 7 and Windows server 2019, 2016, 2012, 2008, 2003
RAM: 16 GB minimum (32 GB recommended)
Hard Disk: 250 MB for installation files
Once you meet these prerequisites, download the software from here.
After downloading the software, run the ‘StellarRepairforMSSQL.exe’ executable file. The file is 6 MB approx and, takes just a few minutes to install. Follow the prompts on the screen to complete the installation process.
Using the Software
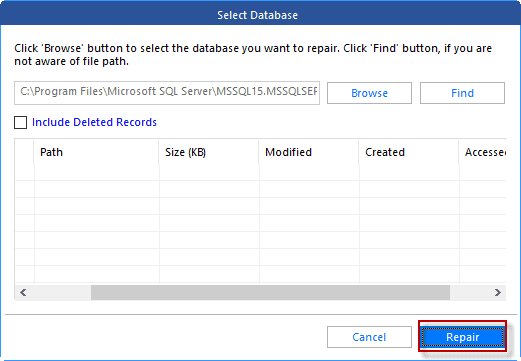
The software provides options to upload a corrupt SQL database MDF file. Use the ‘Browse’ option to select the corrupted database file.
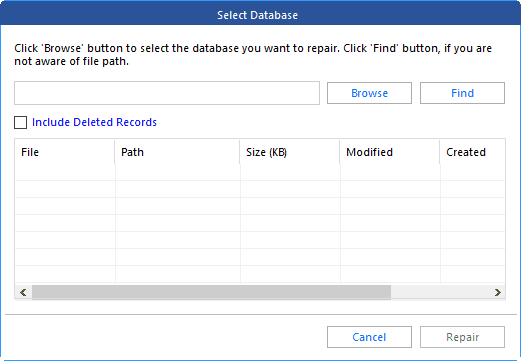
The software also provides a ‘Find’ option to search for the file if its location is unknown.
Note: if you want to recover any deleted data, ensure that the ‘Include Deleted Records’ checkbox is checked.
Another way to look for the data file is to run the following T-SQL query.
SELECT name, physical_name
FROM sys.database_files;
The query to the system database files tables will return the name of the files and the path.

After selecting the corrupt SQL database file, click ‘Repair’ to proceed.
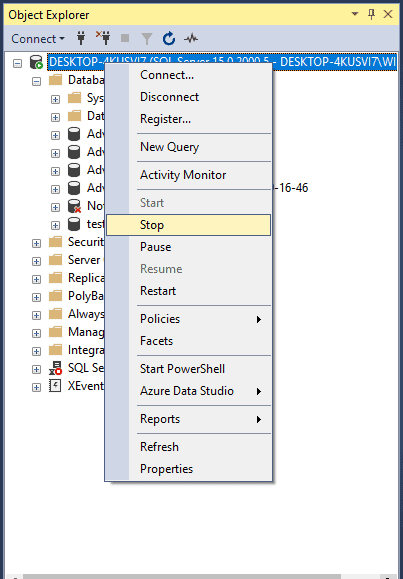
Note: If the database you want to recover is in use by another user, you will get an error ‘the file is in use’ and prevent you from running the recovery process.

You will need to stop the SQL Server service or set the database offline. I strongly recommend using the second option, as it only affects a particular database. But, the first option could affect all the databases.
To stop the SQL Server service, open SSMS, right-click on the server instance and click Stop.
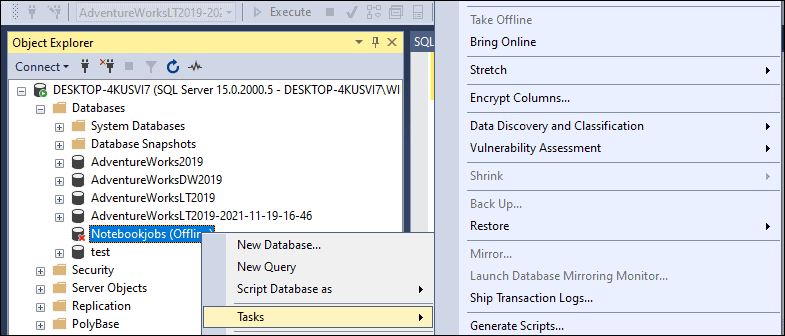
The recommended option would be to set the database offline using SSMS. To do that, right-click on the database, select Tasks>Take offline
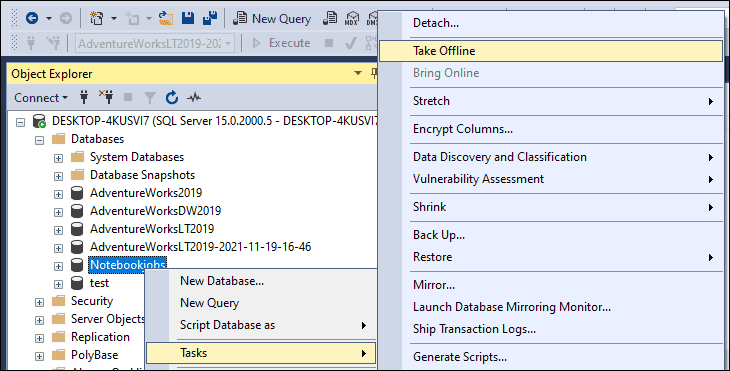
To bring it Online, right-click the database and go to Tasks>Bring Online (do this later after restoring the data).
Once the database is offline, start the repair operation to fix the corrupted database file and recover its objects.
The software provides the following options to scan the selected database file.
- The Standard Scan (Recommended), the faster option will scan and recover the information. This usually solves most of the problems.
- The Advanced scan is recommended only if the first option fails. This option is used when the corruption level is too high.
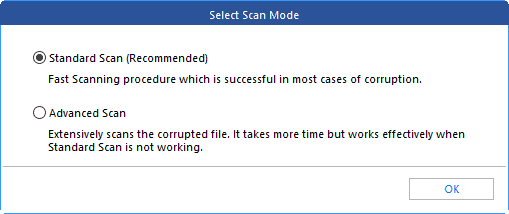
We will select the first option. If everything is OK, you will receive the following message:
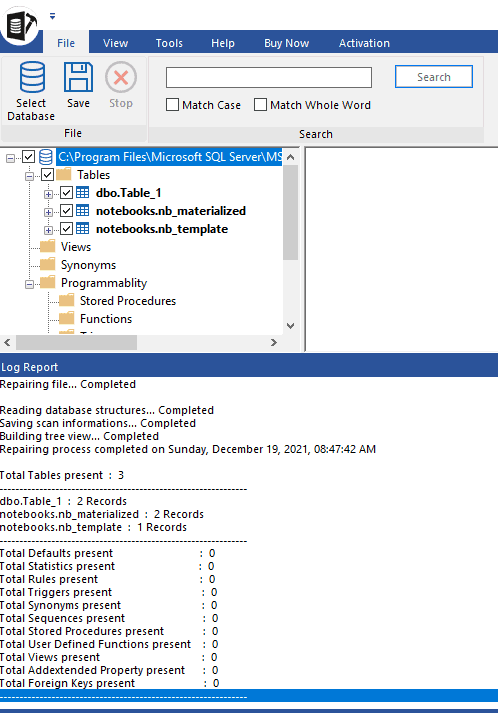
Selected MS SQL database repaired successfully.
You will be able to navigate and see all the objects recovered in a preview window.
Here, I like how the software generates a log report summarizing the number of objects retrieved.
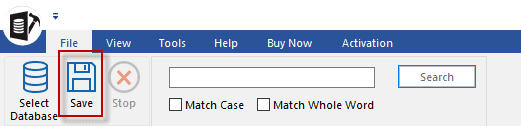
The next step is to save the recoverable database and its data.
Note: If you have downloaded the trial version of the software, this part may not work. To get a license, click Buy Now in the menu or Activation if you’ve already bought a license to activate it.

To save the recovered data, click the Save option on the File menu.
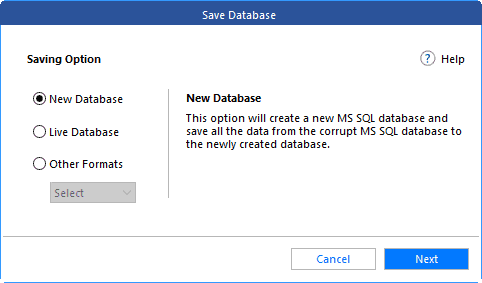
The software provides 3 options to save the data. We can choose to store the information in a New Database. This option will create a new database to restore the data. The other option is to save the data in a Live Database. And the last option is to store in other formats. In this review, we will show the Other Formats.
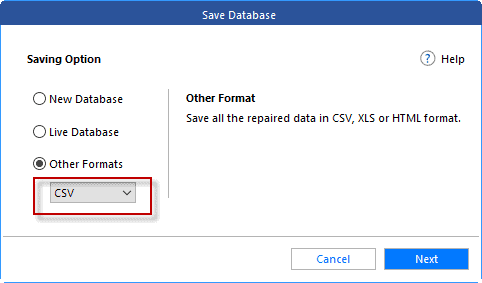
If we choose the Other Formats option, the recovered information can be stored in a CSV format (comma-separated values). This format is easy to read, and does not take too much disk space. The other option is to store in XLS format. The file can be accessed in MS Excel or another compatible spreadsheet program.
Finally, we can store the information as HTML (Hypertext Markup Language). This option is useful for documentation or to create fancy reports.
In this example we will save in CSV format and then press Next.
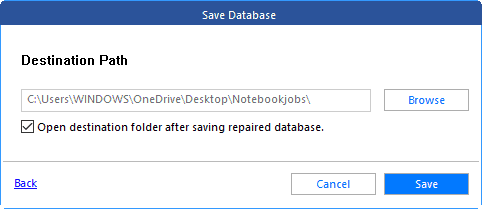
The software will ask for a path to store the CSV files. Please choose the path of your preference and then press Save.
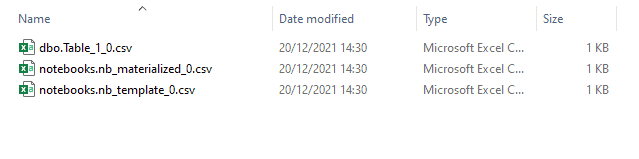
If everything is OK, the software will show you the CSV files created with the recovered information.
Conclusion
In this review, we talked about the Stellar Repair for MS SQL software. It’s a reliable solution that helps recover a database across all major versions of SQL Server 2019, 2017, 2016, and earlier. Also, it provides multiple file saving options like New Database, Live Database, or Other Formats like CSV, HTML, or XLS. I strongly recommend this software to users who need a solution to perform database recovery with minimal downtime. If you have more questions related to this software, please write your comments at the end of this review. Thanks a lot for your time and I hope you enjoyed the review of the software as much as I did.